
You know that moment when you crave chocolate chip cookies but also want something a little extra? That’s exactly why I started making chocolate chip cookie dough twists. They give you the gooey cookie vibes you love, plus that bakery-style swirl that makes people think you worked way harder than you did.
I remember the first time I twisted cookie dough instead of scooping it. I stared at the tray like, “Wait… why do these look fancy?” Ever tried something simple that instantly felt like a level-up?
Let’s talk about how these twists work, why they taste incredible, and how you can make them perfectly every single time.
What Are Chocolate Chip Cookie Dough Twists?
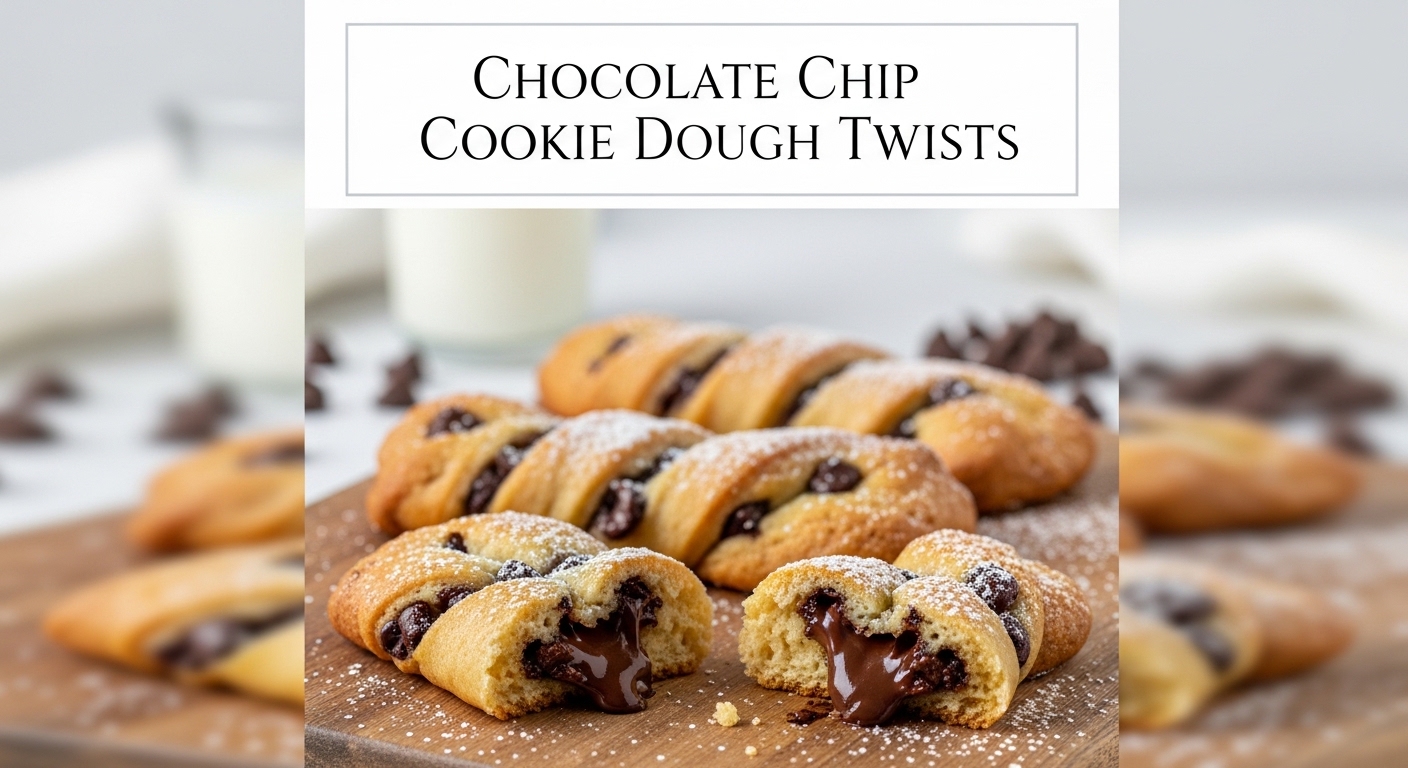
Chocolate chip cookie dough twists take classic cookie dough and shape it into twisted strands before baking. That twist changes everything — texture, appearance, and even flavor distribution.
Instead of one uniform cookie, you get layers. Some parts turn crisp, some stay soft, and chocolate melts into pockets throughout the twist.
Key idea: You create texture contrast without changing the base recipe.
Honestly, that feels like baking magic.
Why Twists Taste Better (Yes, Really)
I didn’t expect twists to taste different. I thought they would just look cute. I was wrong — and happily wrong.
The twisting process creates:
- More caramelized edges
- Layered buttery texture
- Chocolate pockets instead of flat distribution
- Bakery-style visual appeal
Ever noticed how croissants taste better than plain bread even with similar ingredients? Same logic. Layers win.
IMO, twists feel like the “upgrade button” for regular cookies.
Ingredients You’ll Need
The beauty of chocolate chip cookie dough twists lies in simplicity. You don’t need fancy ingredients — just solid basics.
Core Ingredients
- Butter (softened) — Creates richness and structure
- Brown sugar + white sugar — Adds moisture and crisp edges
- Eggs — Bind everything together
- Vanilla extract — Boosts flavor depth
- All-purpose flour — Provides structure
- Baking soda — Helps spread and lift
- Salt — Balances sweetness
- Chocolate chips or chunks — The star
Important tip: Use chocolate chunks for dramatic melted pockets.
Trust me — chunks change the experience.
How To Make Chocolate Chip Cookie Dough Twits (Step-by-Step)
Twisting sounds complicated, but it isn’t. If you can roll dough, you can twist dough.
Step 1 — Make the Dough
Cream butter and sugars until fluffy. Add eggs and vanilla, then mix dry ingredients.
Fold in chocolate last. Always.
Goal: Soft, slightly sticky dough.
Step 2 — Chill the Dough
Chill for 30–60 minutes.
Why? Because warm dough spreads and ruins twists. Nobody wants blob cookies pretending to be twists :/
Key takeaway: Cold dough holds shape.
Step 3 — Roll Into Ropes
Scoop dough and roll into ropes about finger thickness.
They don’t need perfection. Rustic looks better anyway.
Ever noticed bakery items look slightly messy? That’s intentional charm.
Step 4 — Twist
Take two ropes and twist them together like a soft pretzel strand.
Place on baking tray with space.
Do not over-tighten twists. Tight twists bake dense.
Step 5 — Bake
Bake at 175–180°C (350°F) for 10–13 minutes.
Edges set. Centers stay soft.
Pull them slightly early for gooey results. Always.
Texture Secrets (This Changes Everything)
Texture makes or breaks cookie dough twists. I learned this after several trays… and emotional damage.
For Softer Twists
- Use more brown sugar
- Slightly underbake
- Chill longer
- Use bread flour mix
For Crisp Edges
- Roll thinner ropes
- Bake longer by 1–2 minutes
- Add extra sugar sprinkle before baking
Golden rule: Thickness controls texture more than time.
Ever wondered why bakery cookies feel different even with the same recipe? Shape matters.
Flavor Variations You Should Try
Once you master the base, you’ll want variations. I fell into this rabbit hole fast.
Popular Twist Variations
- Stuffed twists — Add Nutella strip inside
- Brown butter twists — Deeper flavor instantly
- Sea salt finish — Balances sweetness
- Double chocolate twists — Cocoa dough + chips
- Chunky bakery style — Giant dramatic twists
My personal favorite? Brown butter + sea salt. It tastes expensive without actually being expensive.
FYI — this combo impresses everyone.
Common Mistakes (I Made All Of These)
Let’s save you from frustration.
Biggest Mistakes
- Skipping chilling → twists spread
- Too much flour → dry dense layers
- Over-twisting → tight heavy texture
- Overbaking → you lose the gooey magic
- Small chocolate chips only → less dramatic pockets
One painful lesson: pretty dough doesn’t guarantee pretty cookies. Structure does.
Comparing Twists vs Regular Cookies
So… are twists actually better, or just prettier?
Chocolate Chip Cookie Dough Twists
Pros
- More texture contrast
- Bakery look
- Better chocolate distribution
- Feels premium
Cons
- Slightly more prep time
- Requires chilling discipline (ugh)
Regular Chocolate Chip Cookies
Pros
- Faster
- Foolproof
- Classic nostalgia
Cons
- Less texture variation
- Looks simpler
My honest take: regular cookies win for speed, but twists win for experience.
Ever baked something simple that made people think you bought it? Exactly.
Pro Tips From Experience
These tips separate “good” from “wow.”
- Mix chocolate sizes (chips + chunks)
- Freeze shaped twists for thicker bake
- Add extra chocolate on top before baking
- Use parchment, never greased trays
- Let cookies rest 10 minutes after baking
Resting sounds boring, but it sets structure and flavor. Patience pays off.
Yes, I struggle with this too 🙂
Storage & Make-Ahead Tips
Twists actually store well, which makes them perfect for batch baking.
Storage
- Room temp: 3–4 days airtight
- Fridge dough: up to 3 days
- Freezer shaped twists: up to 2 months
Make-Ahead Strategy
- Make dough
- Shape twists
- Freeze
- Bake from frozen (+2 minutes)
Best tip: Freeze before baking for thicker bakery texture.
Future you will feel grateful.
Final Thoughts
Chocolate chip cookie dough twists turn a familiar recipe into something exciting without extra complexity. You keep the same ingredients, but the twist changes texture, appearance, and overall experience.
That’s why I keep making them. They feel special without feeling difficult — the perfect baking sweet spot.
If you remember only a few things, remember this:
- Chill the dough
- Roll ropes evenly
- Don’t over-twist
- Pull slightly early for gooey centers
- Use chocolate chunks
Next time you crave cookies, try twisting instead of scooping. Small change, big payoff.
And honestly… once you start making twists, regular cookies feel a little boring. Don’t say I didn’t warn you. 🍪